We’ve all been there — the moment of dread when your trusted Lenovo laptop refuses to spring to life. As your fingers hover anxiously over the power button, the screen remains stubbornly dark.
That’s why we’ve put together this comprehensive, user-friendly guide. This article will steer you through a simple 10-step troubleshooting process to resolve the ‘Lenovo laptop won’t turn on’ issue, encompassing Lenovo Thinkpads as well.
- Understanding the Issue
- Quick Fix for Lenovo Laptop Not Turning On
- Comprehensive Solutions for Lenovo Laptop Not Turning On
- Step 1: Interpreting Your Laptop’s Status Lights
- Step 2: Inspect The A/C Adapter And Battery
- Step 3: Attempt a Battery-Only Power Up
- Step 4: Use The Emergency Reset Button
- Step 5: Press The Lenovo NOVO Button
- Step 6: Troubleshoot Blank Lenovo Display Screen
- Step 7: Check A/C Adapter and Power Port for Damage
- Step 8: Check For A Damaged Battery
- Step 9: Is The Power Button Blinking or Flashing?
- Step 10: Remove and Re-Seat Internal Components
- Lenovo Laptop Not Turning On Conclusion:
THIS POST MAY CONTAIN AFFILIATE LINKS. As an Amazon Associate, I earn from qualifying purchases. PLEASE READ MY DISCLOSURE FOR MORE INFO.
Understanding the Issue
Before we dive into the solutions, it’s crucial to understand what might cause your Lenovo laptop not to turn on.
Various factors could be at play here, from a drained battery, or faulty power supply, to more serious hardware or software issues.
Quick Fix for Lenovo Laptop Not Turning On
In some cases, the issue might be resolved with a quick fix.
- Unplug the A/C adapter and remove the battery if possible.
- Next, hold down the power button for about 30 seconds.
- Then, plug in the A/C adapter and boot the machine.
- Finally, re-install the battery.
This method works as a quick reset for your laptop’s power state, and might just solve your problem. If not, keep reading for comprehensive solutions.
Comprehensive Solutions for Lenovo Laptop Not Turning On
If the initial quick fix didn’t bring your Lenovo laptop back to life, don’t lose hope just yet.
We have a more detailed, step-by-step approach to tackle this issue. Let’s delve into the heart of the matter: Is your laptop getting any power at all?
Even though your laptop isn’t turning on, it may still be receiving power – a crucial first fact to confirm.
In this guide, we will take you through a journey of discovery, helping you determine if the problem lies within the laptop, the display screen, or perhaps the A/C adapter and battery.
Remember when John, a fellow Lenovo user, experienced the same predicament? His issue was with the A/C adapter, which was easier to fix than he had anticipated.
Here is a carefully curated 10-step protocol, each step targeted at isolating and troubleshooting potential trouble spots, all aimed at reviving your Lenovo laptop:
- Interpreting Laptop Status Lights
- Inspecting the A/C Adapter and Battery
- Attempting a Battery-Only Power Up
- Employing The Emergency Reset Button
- Activating The Lenovo NOVO Button
- Examining The Lenovo Display Screen
- Verifying the A/C Adapter And Port
- Assessing For A Damaged Battery
- Decoding The Power Button’s Blinking Pattern
- Removing Internal Components
Just like John, you might just find the solution within these steps and be back to work on your beloved Lenovo laptop in no time.

Step 1: Interpreting Your Laptop’s Status Lights
We understand how worrying it can be when your trusted Lenovo laptop won’t power up. But did you know that your laptop tries to communicate with you even when it’s not turning on?
It does so through its status lights. Let’s play detective and see what these lights are trying to tell us.
Check This First: Plug in your A/C adapter and observe. You’re looking for a light – usually at the base of your display screen or near the adapter port. No, it’s not playing hard to get; it’s quite easy to spot.
- Light On: Good news! Your laptop is receiving power. Time to pat yourself on the back and move on to Step 2.
- Light Off: Stay calm, detective. It’s time to scrutinize the A/C adapter and battery. We’ve got this.
Wait, what if the power outlet is faulty? Excellent point. Always question the obvious. Let’s double-check that the power outlet is working.
Try This: Switch on your laptop.
- Boots Up: Bravo! Your laptop’s alive and kicking. If not, hold tight – we have more steps to bring your laptop back to life.
- Remains Dark: Keep that detective hat on. Our journey continues with the next steps.
I’m right here, walking you through each step. Let’s get your trusty Lenovo laptop humming again.
Step 2: Inspect The A/C Adapter And Battery
Your laptop won’t turn on without a functional battery or an operational power supply from the wall outlet.
Here’s how to investigate:
Check This First: Ensure the A/C adapter is correctly plugged in and the battery is charged. Also, verify they’re both firmly connected and in a good state. Don’t forget to inspect the battery connections — they should be correctly connected and undamaged.
- Everything’s Connected and Intact: High five. It’s time to move on to the next task — testing the wall outlet.
- Something’s Amiss: Replace the faulty component, whether it’s the A/C adapter or the battery. Once replaced, try to turn your laptop on again. If it still doesn’t work, read on.
Testing The Wall Outlet: Is the outlet you’re using working correctly? Test it by plugging in another device such as a phone charger.
- Outlet Works: You’re doing great! With a working outlet, we can now explore deeper issues that could be causing the problem.
- Outlet Doesn’t Work: Locate another functional outlet, plug in your A/C adapter, and try turning on your laptop again.
If your laptop still refuses to switch on, then it’s time to inspect the power supply port. Up next, we’re getting closer to the root cause of your laptop’s power issue. Hang in there.
Step 3: Attempt a Battery-Only Power Up
Now let’s take a closer look at your Lenovo laptop’s battery. This step is important because it helps to isolate the issue and determine whether the problem is with the power supply or the battery.
From my experience, the source of power can occasionally be the culprit when your laptop won’t turn on.
Let’s test this out with a simple trick I swear by – attempting a power-up using only the battery.
- First, unplug your A/C adapter.
- Now, go ahead and carefully locate the battery slot on your laptop’s underside.
- Once you’ve found it, make sure to reinsert your battery securely, ensuring it fits snugly in its proper place.
- Now, press that power button.
If your laptop springs back to life, give yourself a pat on the back. It seems like your A/C adapter might be the issue. In this case, we recommend trying a different A/C adapter to verify if that truly was the problem.
However, if your laptop remains unresponsive, don’t worry – this is valuable information. It suggests that the issue could be with the battery itself.
But no need to panic, we still have plenty more options to explore in the steps ahead. I’ve been through many such situations, and trust me, there’s always a way.
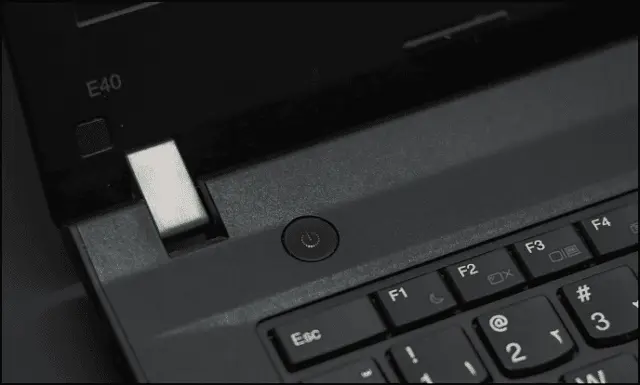
Read my article on How To Extend Battery Life. With some simple steps, you can make sure your devices are always working at peak efficiency.
Step 4: Use The Emergency Reset Button
Here’s our next tip that could just do the trick: utilizing the Emergency Reset Button. Some Lenovo laptops have a small hole on the back base plate known as the “Emergency Reset Hole.”
This small yet mighty tool is designed to cut off power to your Lenovo system, whether from an internal or external battery, and give the laptop a fresh start.
It’s like a secret weapon hidden in plain sight.
Here’s how you can use this:
- Gently turn your laptop upside down and search for a small hole situated on the back base plate. This hole is the gateway to your Emergency Reset Button.
- Once located, you’ll need a straight pin or a paper clip to reach the button inside. Yes, it’s time to bring your inner MacGyver to use.
- Press the emergency reset button by inserting your device into the hole. Hold it for a few seconds and let it work its magic.
- Finally, flip your laptop back, press the power button, and wait for your device to power back to life.
Remember, patience is key here. Sometimes, it takes a few moments for the reset process to take effect. But if things don’t work, there are still more troubleshooting steps we can try.
Performing this emergency reset can often be the silver bullet your system needs to shake off any issues and start anew.
Step 5: Press The Lenovo NOVO Button
As an experienced Lenovo tech, I know how crucial it is to have an effective plan B when dealing with tech issues. That’s where the Lenovo NOVO button comes into play.
This unique feature is available on select IdeaPad laptops, such as the IdeaPad S340. It acts as a lifesaver when your laptop refuses to turn on, allowing you to reset the system and boot into recovery BIOS.
This tiny button marked with a curved, upside-down arrow is usually found next to the power button or on the laptop’s side. But don’t be fooled by its modest appearance – it has the power to get your Lenovo back on track.

Here’s my guide on how to use the Lenovo NOVO button:
- Start by locating the NOVO button on your Lenovo laptop. It’s a small hole with what looks like an inverted U or a backward arrow. A bit of a hide-and-seek game, isn’t it?
- Once you’ve found it, press and hold the NOVO button for a few moments. Wait until the Novo Button Menu appears on your screen. This wait can be suspenseful, but it’s worth it.
- In the Novo Button Menu, select “System Recovery” and give that Enter key a tap.
- Now, simply follow the on-screen instructions to finish the system recovery process.
- Once the recovery process is complete, cross your fingers and power on your Lenovo laptop. Hopefully, it will wake up from its slumber.
If your laptop still remains off, don’t lose heart. We’ve got more techniques up our sleeves. Just remember, every step is a learning experience in our tech journey.
>> Get yourself a NEW Lenovo laptop with free shipping through my affiliate link, if you make a purchase I receive a small percentage but there are no added costs to you. Click the banner to get yours.

Step 6: Troubleshoot Blank Lenovo Display Screen
It might seem like your laptop has given up on you, but sometimes, the laptop isn’t as unresponsive as you may think. It might just be a case of a ‘blank’ display screen.
It’s like the system is whispering, but we need it to speak up. Let’s see how we can get the conversation flowing again.
Here’s what you can do to troubleshoot a blank Lenovo display screen:
- Power on the laptop and observe the system carefully to see if it shows any signs of activity, such as LED lights turning on, fan noise, or hard drive activity.
- If you hear fan noise or the hard drive working but the screen remains blank, try connecting the laptop to an external display or monitor to see if the display appears there. If so, the issue may be with the laptop’s internal display or graphics card.
- No external display to connect to? No worries, we have another method up our sleeve. Let’s try to wake up your laptop by booting in safe mode or entering the BIOS setup screen. If the display works in this mode, then it might be a software glitch rather than a hardware hiccup.
Remember, each computer has its unique quirks and personality, so patience is key here. This tech journey is a learning process, and each step brings us closer to a solution.
Let’s keep going, and I’m confident we’ll get your Lenovo laptop back to its lively self in no time.
Need some new computer gear? See the Top 5 Best Lenovo Laptops To Buy
With so many different portable monitors on the market, how do you know which one is right for you? We did some research and found the best portable monitors for you.
Step 7: Check A/C Adapter and Power Port for Damage
Alright, let’s roll up our sleeves and delve into the next strategy. If your Lenovo laptop is not powering on, it’s time to take a closer look at the A/C adapter and the power port.
Over my years of delving into the nitty-gritty of tech fixes, I’ve often seen overlooked details like a frayed wire or a wobbly port causing all the trouble.
Break it down: Your A/C Adapter
Your A/C adapter and cable are your laptop’s lifeline, connecting it to a power source and ensuring it’s all charged up when you need it the most. Here’s how I want you to inspect it:
- Unplug your adapter and give it a good once-over, checking for fraying, cracks, or any other telltale signs of damage. In my experience, a damaged adapter often turns out to be the silent villain.
- If you spot any damage, you should consider getting a new adapter. It’s a small price to pay to bring your laptop back to life.
Turn it around: Your Power Port
The power port on your laptop, where you plug in the adapter, also needs some TLC. It’s easy to overlook but trust me, I’ve seen worn-out ports playing truant all too often. Here’s what to do:
- Examine the power port closely for signs of wear and tear. If it’s worn or loose, it might not be making a secure connection, leaving your laptop starved for power.
- If you suspect a damaged port, it might be time to let a professional have a look. While I’m all for DIY, some things are best left to the experts.
Remember, each step gets us closer to the finish line. Let’s keep digging, and I’m confident we’ll find the solution.
Step 8: Check For A Damaged Battery
Having gone through the previous steps, you might have a sneaking suspicion that the problem lies with your laptop’s battery.
Let’s dig deeper and approach this systematically. I’ve seen many laptop woes easily resolved by a thorough battery check, even when it wasn’t the top suspect. So, bear with me as we dive into this crucial step.
The Initial Glance: Visual Inspection
Launch your inspection with a careful examination of the battery’s exterior. You’re looking for unusual signs like swelling, cracks, or fluid leakage.
Over the years, I’ve seen many batteries sporting such telltale signs, silently crying out for help. If you notice any such damage, don’t hesitate; to get that battery replaced immediately.

The Right Fit: Insertion Check
Next, ensure your battery snugly fits into its designated space within the laptop. If it’s not correctly seated, it fails to charge or deliver power successfully.
The Power Flow: Charging Test
Now, let’s examine if the battery accepts charge as it should. If your battery isn’t charging despite a live power source, consider testing with a different A/C adapter and cable.
I’ve often seen adapters quietly fail while the spotlight falls on the battery.
Going Solo: The A/C Adapter Test
If your Lenovo laptop model permits battery removal, try this simple test: remove the battery and power on the laptop using only the A/C adapter.
If your laptop springs to life, your battery might be the culprit, and it’s time to hunt for a replacement.
The Health Report: Battery Health Evaluation
Another key checkpoint is your battery’s health status. If your battery is old or worn out, it won’t hold a sufficient charge to power up your laptop.
You can easily check the battery health using Lenovo’s Vantage app or any reputable third-party battery diagnostic tool. I’ve found this invaluable in diagnosing elusive power issues.
The Fresh Start: Battery Replacement
If your battery inspection yields unfortunate results, replacement is the best way forward.
You can source a new battery from Lenovo or an authorized third-party vendor. A fresh battery often injects new life into a laptop, solving a host of power-related issues.
The Last Resort: Battery Reset
In certain instances, a simple battery reset can work wonders.
To perform a reset, switch off the laptop, disconnect the A/C adapter, and remove the battery. Then, press and hold the power button for about 30 seconds to discharge residual power.
Afterward, reinsert the battery and A/C adapter before attempting to power on the laptop. I’ve seen this humble reset bring numerous laptops back from the brink.
Remember to reference the Lenovo Battery Reference Guide if you need model-specific battery information.
Step 9: Is The Power Button Blinking or Flashing?
Ever noticed your Lenovo laptop’s power button blinking or flashing, and it just refuses to wake up with any key press? This tricky situation often leaves users puzzled. Let’s demystify the blinking power button scenario together.
Normally, when your Lenovo laptop’s power button flashes, it signifies that it’s in sleep or standby mode. All it needs is a gentle nudge – a simple keypress should wake it up.
But when the blinking is coupled with your laptop not powering on, it’s time to roll up your sleeves and troubleshoot.
Follow these steps diligently to get your Lenovo laptop back in action:
- Power Off: Start by pressing and holding the power button for about 15 seconds. This should ideally turn off your laptop.
- The Emergency Reset: Check if your laptop has an ‘Emergency Reset Hole’ (refer to step 4 for its location). If it does, find a pin or a needle, and press inside this tiny hole. This action can often reset your system and might just do the trick!
- Power On Attempt: After performing the emergency reset, try powering on the laptop again. If it springs back to life, great! If not, don’t worry – continue with the next steps.
- Battery Removal: This step involves removing both the external and internal batteries (detailed in step 10) from your laptop. Be cautious and patient while doing this to avoid any damage.
- Discharge Residual Power: Once the batteries are removed, press and hold the power button again for 15 seconds. This action discharges any residual, or leftover, power in the laptop.
- Reinsert Batteries: After ensuring all residual power is drained, reinsert both the internal and external batteries back into their respective slots.
- Final Power On Attempt: With the batteries back in place, attempt to power on your laptop again.
Don’t lose heart if the first attempt doesn’t work. It’s not unusual for troubleshooting steps to work on the second or third attempt. Move on to the final step below.

Step 10: Remove and Re-Seat Internal Components
If your Lenovo laptop is still stubbornly refusing to turn on, it might be time for you to step up the game a notch. This step will involve a hands-on approach, where you’ll dive into the internals of the system – namely the hard drive, memory modules, and the elusive internal battery.
Unseat them, and then return them to their rightful homes. This process, known endearingly as re-seating, can often shake loose any issues that are keeping your laptop from lighting up.
Let’s walk you through this procedure.
- Power Down: Before anything else, ensure your laptop is turned off and separated from any external power source. Safety first, always.
- Back Cover Removal: Get a screwdriver – the right size, not the one you use to fix everything around the house. Use it to gently remove the back cover of your laptop.
- Locate the Key Components: Once the back cover is removed, you’ll be looking at the guts of your laptop. Don’t be overwhelmed. You’re looking for three components – the hard drive, memory modules, and the internal battery. Refer back to your laptop’s manual if you’re unsure.
- Removal and Re-seating: Carefully, with the patience of a Zen master, unseat each component. Once removed, return them confidently but gently to their respective slots. This “shaking up” process can often clear up any ghost issues.
- Put it Back Together: Replace the back cover of the laptop and screw it back in place. Remember, righty-tighty, lefty-loosey.
- Power Up: Now, with a little trepidation, power on your laptop. Fingers crossed.
If all of these steps have been to no avail, don’t despair. Reach out to Lenovo support to have the system serviced and repaired.
You’ve done an outstanding job making it this far. Now, let the professionals step in. Remember, there’s no shame in calling for reinforcements when you need them.
Locate a Repair Center for Lenovo Laptops.
You can also find helpful resources on Lenovo’s website, such as parts replacement videos, warranty status checks, and a battery and power adapter finder. If your laptop needs repair, you can locate a repair center through their website.
Check out my articles titled: Level Up: 10 Hacks to Boost Laptop Speed, and Maximize Laptop Performance: Mastering Overclocking to achieve maximum performance.
Laptop Repair Primer (free guide) for additional information about repair steps.
These links below should provide support for your particular Lenovo Laptop.
Order Replacement Parts for Lenovo Laptops.
Check your Warranty Status for Lenovo Laptops.
Battery and Power Adapter Finder for Lenovo Laptops.
Lenovo Laptop Not Turning On Conclusion:
A Lenovo laptop that won’t turn on can be a frustrating problem, but there are a number of steps that can be taken to troubleshoot and fix the issue.
You’ve journeyed through a 10-step troubleshooting expedition, navigating the intricacies of power cycles, ‘Emergency Resets’, meticulous battery removals, and the art of component reseating. These strategies are your toolkit, designed to breathe life back into your laptop.
With these insights, your Lenovo laptop should be back up and running in no time.

J.S. is the owner, content creator, and editor at Upgrades-and-Options.com. I’ve worked in the IT and Computer Support field for over 20 years. The server hardware in my computer labs has mostly been IBM, but I’ve supported Dell, HP, and various other hardware. In addition, as part of my lab administrator responsibilities, I’ve learned, supported, and repaired/upgraded network hardware such as Cisco routers and switches. READ FULL BIO >>

